How to create a new supplier
Step 1
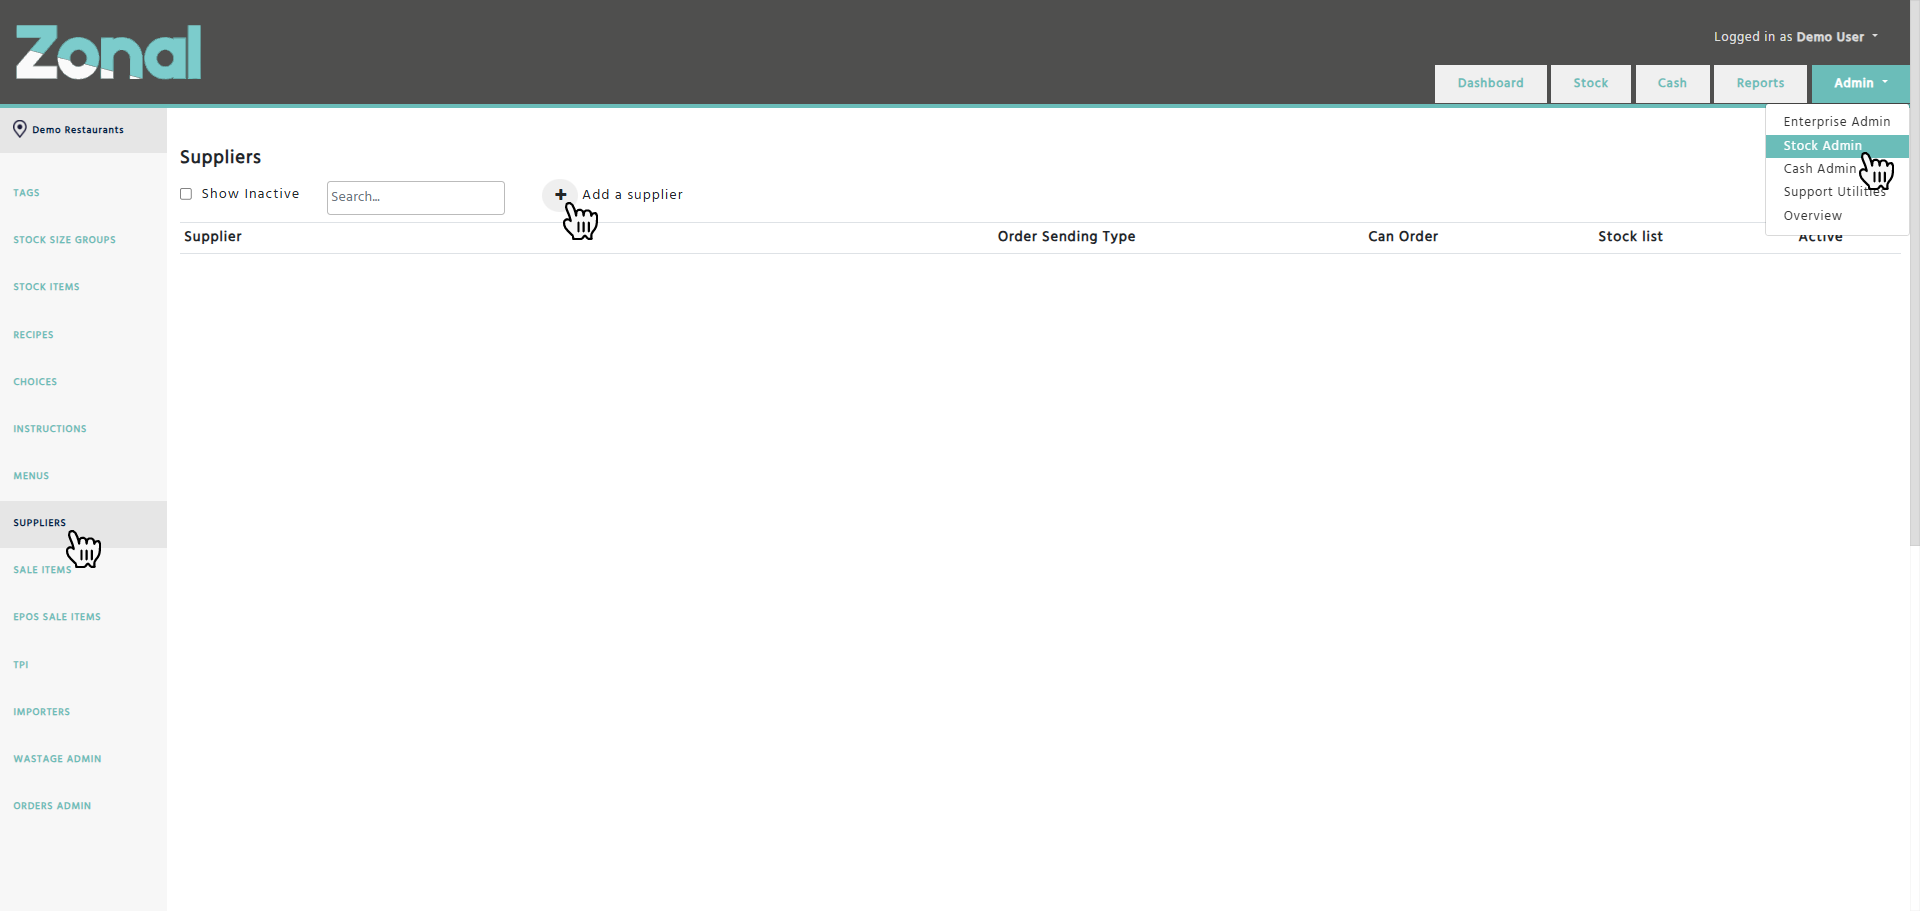
Go to Stock Admin, select the Suppliers page from left-hand side menu, then click on the ‘Add a supplier’ button.
Step 2
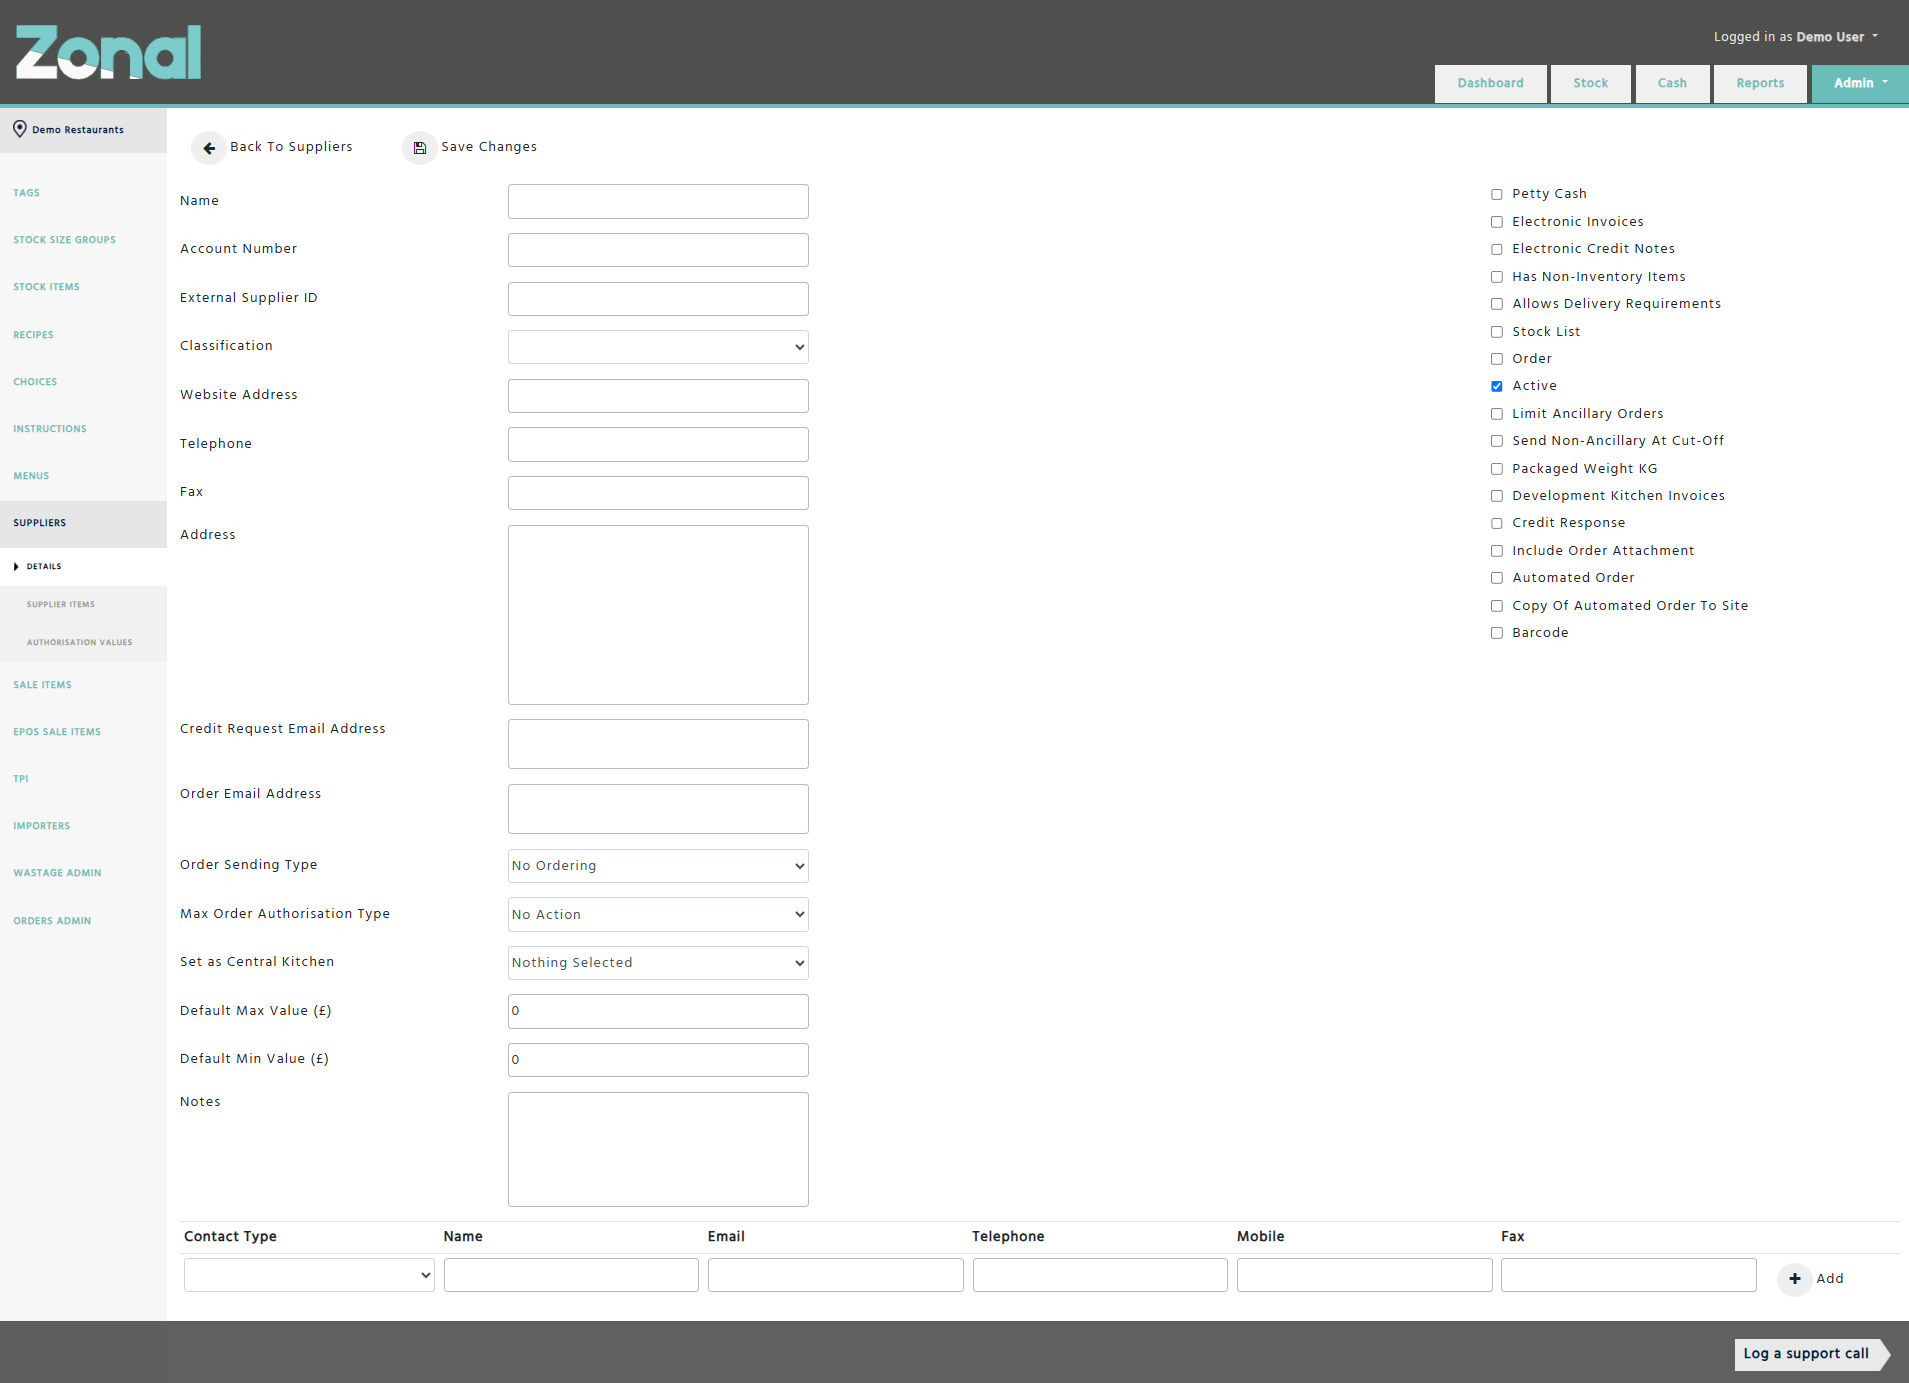
Complete the below fields with the supplier’s information on the left-hand side of the page.
Name – add the supplier’s name.
This field is mandatory.
Account Number – add the supplier’s account number.
External Supplier ID – add the supplier's Integration ID if the supplier is integrated with Acquire or a third party.
Classification – select ‘Wholesaler’, ‘Distributor’, or ‘Agent’ from the drop-down field.
Website Address – add the supplier’s URL.
Telephone – add the supplier’s telephone number.
Fax – add the supplier’s fax number.
Address – add the supplier’s address.
Credit Request Email Address – add the supplier’s email address where the credit requests can be sent to.
This field is mandatory.
Order Email Address – add the supplier’s email address where the orders can be sent to.
This field is mandatory if the ‘Order Sending Type’ field is set to ‘Email’.
Order Sending Type – select how the supplier wants the orders to be sent to them:
-
TPI – if you send the orders electronically via EDI.
-
Email – if you send the orders by email.
-
Print – if you send the orders by fax.
-
No ordering – if you don’t send orders through Enterprise (e.g.: you place the orders by phone).
-
Central Kitchen – this is for Central Kitchen use only.
-
External Ordering – if you send the orders from Acquire or a third party.
Max Order Authorisation Type – select what should happen when a maximum order value cap is configured for the supplier and an order exceeds that value:
-
No Action – the order can be sent without any additional actions taken.
-
Prevent If Over – the order cannot be sent.
-
Send Email Request – an authorisation email will be sent to a nominated person with a link to authorise or reject the order.
-
Send Email Notification – the order can be sent and a notification will be emailed to a nominated person.
Default Max Value (£) – enter a value if you would like to place a maximum value limit on the orders placed for this supplier.
Default Min Value (£) – enter a value if you would like to place a minimum value limit on the orders placed for this supplier.
Notes – enter any additional notes about this supplier.
Configure the below fields on the right-hand side of the page as required.
Petty Cash – this should only be flagged if you would like to indicate for yourself that the supplier is used for one-off purchases (e.g.: the supplier is the local supermarket).
Electronic Invoices – this should only be flagged for EDI suppliers so that you can receive electronic invoices from the supplier, and you can create an accrual from an order if you don’t receive the relevant electronic invoice in time.
Electronic Credit Notes – this should only be flagged for EDI suppliers so that you can receive electronic credit notes from the supplier.
Has Non-Inventory Items – this should only be flagged if you would like to indicate for yourself that the supplier has non-inventory stock items that will never need to be counted, such as dustbins, pots, pans, crockery, etc.
Allows Delivery Requirements – this should only be flagged for email suppliers if you would like to allow additional notes to be entered on the orders for the suppliers’ information, such as ‘Leave the delivery at the back door.’, etc.
Please note, this is not applicable for EDI suppliers.
Stock List – this should be flagged to allow the supplier’s items to be countable and to be displayed on the Stock Count page.
Order – this should be flagged to allow the supplier’s items to be orderable and to be displayed on the Orders page.
Active – this should be flagged to allow the supplier to be active.
Limit Ancillary Orders – this should only be flagged if you would like to limit the ancillary items within each order according to the configured values within the supplier's 'Default Max Value (£)' and 'Default Min Value (£)' fields.
Send Non-Ancillary At Cut-Off – this field should not be flagged as it is now a redundant field.
Packaged Weight KG – this should only be flagged if you would like to enter packaged weight figures in KG for the supplier’s items.
Development Kitchen Invoices – this should only be flagged if you have a Central Kitchen configured.
Credit Response – this field should only be flagged if you would like to receive a status update for the credit requests when the supplier accepts or rejects them.
Include Order Attachment – this should only be flagged if you would like a CSV file containing the details of the order to be attached to the email that the supplier receives.
Automated Order – this should only be flagged if you would like an automated suggested order to be sent to the supplier when an order has not been sent for a delivery slot within the delivery schedule.
Copy Of Automated Order To Site – this should only be flagged if you would like a copy of each automated suggested order to be sent to the site where the order originated from.
Barcode - this should only be flagged if you would like to enter barcodes for the supplier’s items.
Complete the below fields with the supplier’s contact information at the bottom of the page if required.
Contact Type – select ‘Account Contact’, ‘Sales Contact’, or ‘Head Office Contact’ from the drop-down field.
Name – add the name of the contact.
Email – add the email of the contact.
Telephone – add the landline number of the contact.
Mobile – add the mobile number of the contact.
Fax – add the fax number of the contact.
Once all the above have been completed, click on the ‘Save Changes’ button.
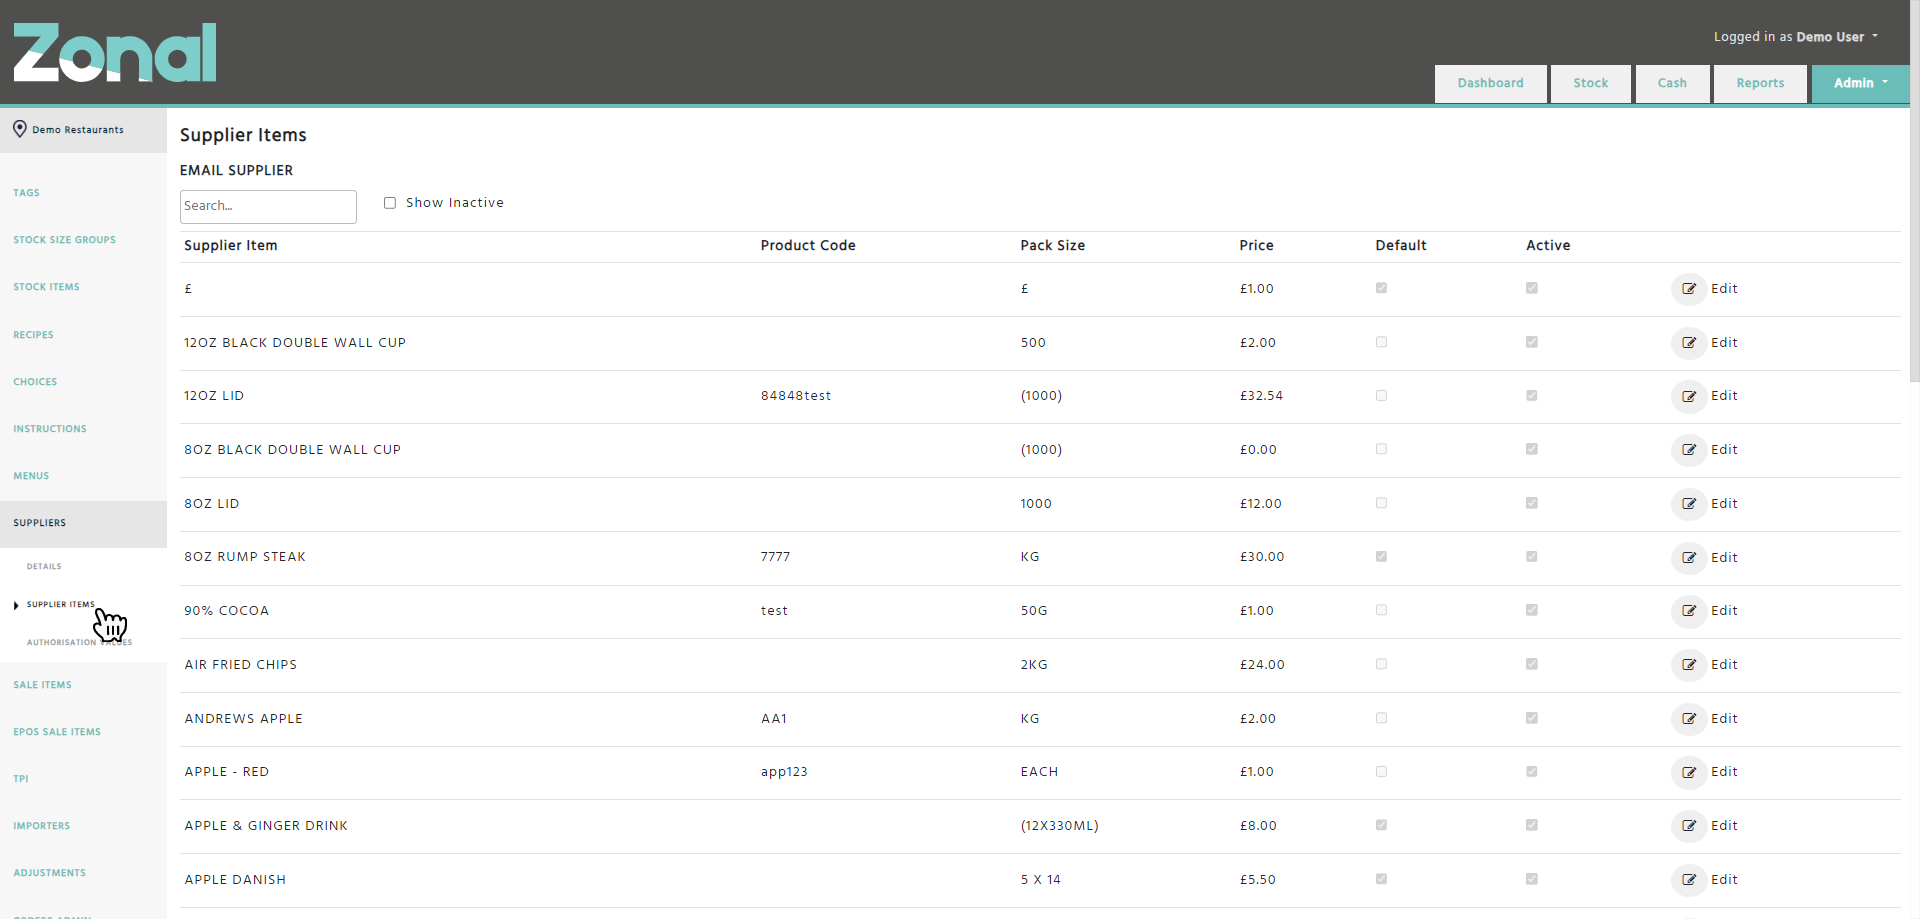
How to view the list of supplier items for a supplier
Go to the supplier’s Details page, then select the Supplier Items page from the left-hand side menu.
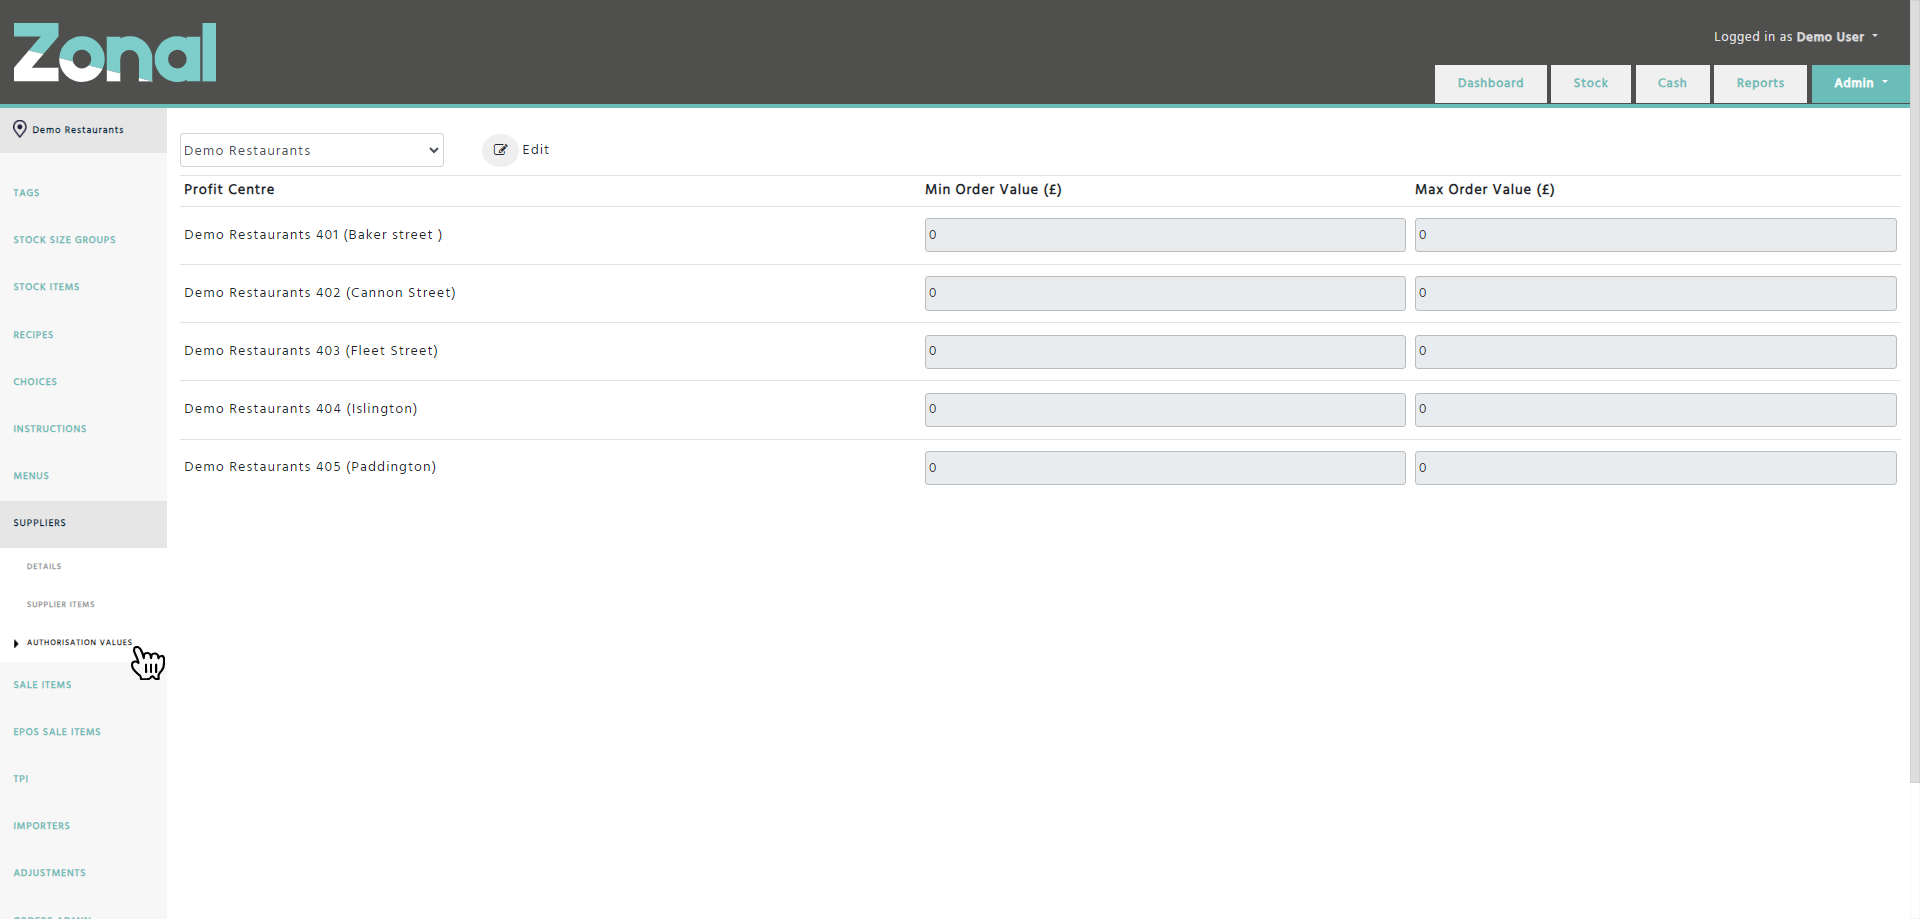
How to configure order value limits per sites
Go to the supplier’s Details page, select the Authorisation Values page from the left-hand side menu, then configure the order value limits for the sites as required.
Sending a test order
Once the supplier has been created, you will need to create a new ‘TEST’ stock item along with a supplier item that has a ‘Test’ product code entered, and you will have to make them available for ordering purposes.
-
The correct email address is entered for the ‘Order Email Address’ field on the supplier’s Details page.
-
A delivery schedule has been configured for the site you are sending the test order from.
-
The test supplier item has a ‘Test’ product code entered.
-
Notify the supplier when they should expect the test order to come through.
-
Make the supplier aware that the restaurant account number will not be included on the order, and provide them with a list of branch codes for all your sites (example: 101 – Dean Street; 102 – Greenfields Road).
Please note, the supplier will clearly see which restaurant the order is coming from. -
Inform the supplier that they will have to click on the link that is included in the email order to acknowledge that order. This will need to be done not only for testing but for all future orders so that managers will be able to track the status of their orders.
-
Include the ‘TEST’ supplier item within the order.
-
Enter ‘TEST - DO NOT DELIVER’ into the ‘Delivery Requirements’ field.
-
Once the order is sent, keep checking the order’s status. As soon as the supplier clicks on the link and acknowledges the order, the order’s icon will change to the below.

Once you see that the order was acknowledged successfully, notify the supplier, then agree on the go live date.
Before you contact the supplier in regards to sending a test order, make sure that the following is completed:
Contact the supplier with the following notes:
When sending the test order:
Important note
If you would like to receive a copy of the orders from a supplier, you can include your own email address as well within the supplier’s ‘Order Email Address’ field. If you are using multiple email addresses, they must be separated by a comma without any spaces included (e.g.: orders@supplier.com,yourname@company.com).